Wire Rope – Cable Clips
Wire Rope Cable Clips
Explain dangers
There’s only one right way to install u-bolt cable clips when you want to get the maximum efficiency—up to 85%—out of a prepared loop or
thimble-eye termination. Otherwise the capacity of the termination can be severely reduced, risking the lives of workers and others nearby.
Because u-bolt clips are often installed incorrectly, double saddle clips (i.e., J-clip or fist grip clips) are preferable. Never use u-bolt clips
when working with suspended access equipment.
Identify controls
Remember this when installing u-bolt cable clips:
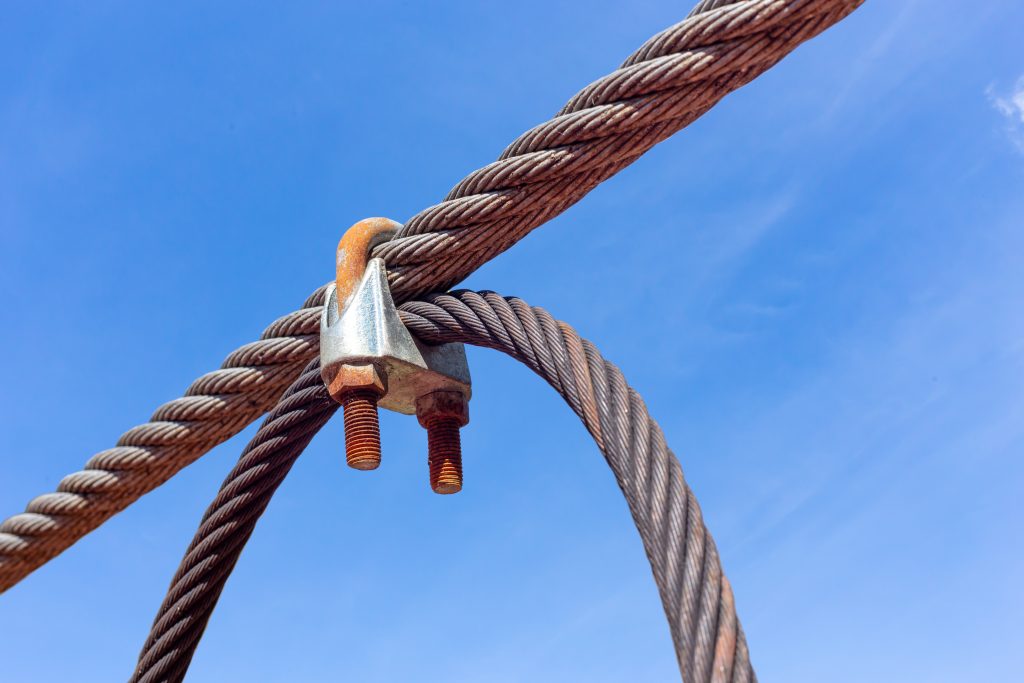
• Most cable clips have two sections. There’s a saddle part and a U-shaped part. You need the right-sized clip for the wire rope diameter.
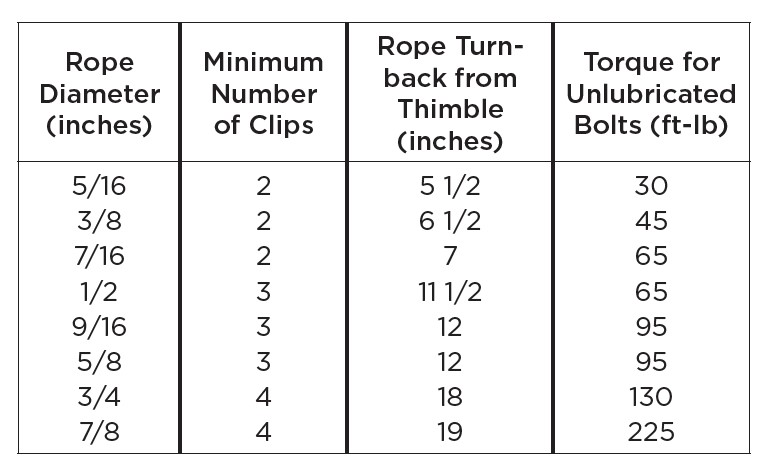
• You need to know the number of clips required, the amount of rope to turn back from the thimble, and the torque needed to tighten the nuts. There are tables that spell out all of this information. (See below.)
• As best practice, use at least three clips when making any prepared loop or thimbleeye termination for wire rope, especially for hoisting.
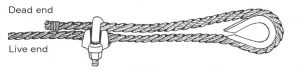
• All three clips must be installed with the saddle part on the live end of the rope. This lets the live end rest in the saddle so it’s not crushed by the U-part of the clip.
• The U-part goes on the dead end of the rope where crushing will not affect the breaking strength of the hoist line.
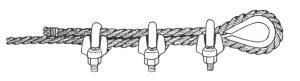
Follow the steps below to install u-bolt clips correctly:
STEP 1: Apply the first cable clip one base width from the dead end of the wire rope. The U-part goes over the dead end, while the live end rests in the clip saddle. Tighten the nuts evenly to the recommended torque.
STEP 2: Apply the second clip as close to the loop as possible. U-part is over the dead end.
Turn nuts firmly but do not tighten.
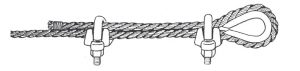
STEP 3: Apply all other clips, spaced equally between the first two. They should be 6-7 rope diameters apart.
STEP 4: Apply tension and tighten all nuts to recommended torque.
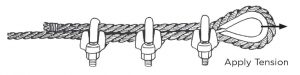
STEP 5: Check nut torque again after the rope has been in operation.
Demonstrate how to install cable clips as you talk. Review the cable clip table with your crew.
It shows the number of clips, the amount of rope turn-back, and the torque required for the specific diameter of wire rope.
For more information, visit the IHSA website.